fitness tips

A must see for the beginner cyclist!

Dynamic bicycle is the first choice for family fitness, convenient, does not take up space, fat loss effect is also very good, but there is no correct use of dynamic bicycle but easy to cause physical injury.

01Possible Hazards of Dynamic Cycling

(1) Knee injury

As a relatively low-impact sports in addition to jogging, dynamic cycling, although belonging to the more gentle movement, but because many drugs to the same action repeated many times, so it is easy to accumulate small injuries and cause team knee damage. Some statistics show that riding an hour of car, pedal about 5000 circles, equal to the knee joint in an hour of bending and stretching 5000 times. As the legs in the bicycle pedaling process repeated circular motion, easy to cause the cartilage in the knee joint overload and damage. And the sudden braking, accelerating, and stopping during bicycle riding also puts more pressure on the knee.

Knee injury

(2) Thickening of legs

Dynamic cycling exercise gives a full workout to the quadriceps, gluteus maximus, posterior thigh muscles on our thighs, and the flounder and gastrocnemius muscles on our calves. Need to be clear when the dynamic cycle can indeed play a good role in shaping these muscle groups, enhance the strength of the lower limb muscles. However, for some athletes who have more fat in the lower limbs themselves, the increase in leg muscles may lead to thicker legs to a certain extent.

(3) Superimposed on the upper limb exercise easy to injury

At present, many dynamic cycling training courses will add some upper body training exercises. However, from a professional point of view, the combination of upper body and lower body exercises will reduce efficiency and calorie consumption. Therefore, in the dynamic cycling training, swinging the upper body is not only counterproductive, in the long run will also damage the body, there are security risks.

02How to regulate to avoid injuries from workouts

Before training on a dynamic bicycle, it is necessary to adjust several positions, especially the seat height, handlebar height and the sequence of the seat.

Adjust the seat height so that the highest part of the seat is in line with the horizontal height of the thigh lift. Adjust the handlebar height so that it is in line with the seat height. Note that the handlebars should be adjusted further up if the trainer is pregnant or has health problems such as back strain.

How to regulate to avoid injuries from workouts

Seat fore and aft position. When adjusting the seat fore and aft position, we’d better get in the car to make the adjustment. First the hips are at the farthest end of the seat and with the footrest at its lowest point, place the heel of the foot on the footrest so that the leg can be straightened or have a slight bend. Next, with the footrest still at its lowest position, place the forefoot on the footrest so that the knee curvature is 23-35 degrees. Finally, with the footrest at a level, check that the knee and the middle of the footrest are in a straight line.

Any exercise program can cause knee strain. So we must do a good job of warming up and stretching before playing sports, and master the correct sports posture.

After reading the above hope can let you correctly use the dynamic bicycle, happy sports ~!
Treadmill running

Q&A about treadmill, read it and you will understand treadmill

readmill indoor running, as a time-saving and convenient, and is not affected by the weather of theexercise by many people’s favor, but for those who intend to try treadmill running, treadmill purchase and use of a lot of questions. This issue pushes for the treadmill to the majority of runners to do an answer.

01Is it true that treadmills hurt your knees?

In fact, there are many reasons for knee damage caused by running, and the reaction force of the hard surface of concrete is even more likely to cause damage to the knee in comparison. The treadmills on the market today have different degrees of shock absorption. As long as one overcomes the problems of incorrect running posture, too long exercise time, too fast setting speed, etc., the use of treadmill will not have adverse effects on the knees.

02What’s the difference between running on a treadmill and running outdoors

The exact feeling varies from person to person, but in general, running on a treadmill will be more effortless and relaxing than outdoors. Running on an indoor treadmill requires less effort as we don’t have to overcome wind resistance. At the same time, the elasticity and shock absorbing design of the treadmill’s conveyor belt also reduces the amount of force required by the body. Many of the treadmills on the market today also come with corresponding courses, which will also be a distraction and easier for runners who are just starting to try out long-distance running.

Treadmill workout

03Do you need special running shoes on the treadmill?

No need, the conveyor belt of the treadmill itself is elastic and softer than the outdoor ground. Running shoes that are normally used for outdoor running can be used directly on the treadmill with no problem.

04Do’s and don’ts of using a treadmill

Indoor treadmill running is much the same as outdoor running, don’t eat too much before exercise, just add some energy appropriately. It’s best to do a full warm-up before you go for a run to avoid muscle strain in the process of running. Treadmill running pay attention to grasp the rhythm, from the slow walking in the transition to running, so that the effect of the movement is the most ideal.

05How to buy a treadmill

There are several key parameters to look at when choosing a treadmill. The motor is the heart of the treadmill, and its quality is related to the treadmill’s life, smoothness, noise and so on. Generally speaking, the motor power is 1HP or 2HP, so you can choose according to your own situation. The slope has a great influence on the knee, generally 2~5° is more suitable, the entry-level treadmill does not have the adjustment function, fixed about 2.6 degrees.


Shock absorption design is very important. Effective treadmills usually use rubber shock absorption or airbag shock absorption, some manufacturers also have their own patents. Entry-level treadmills use EVA or spring damping.

How to buy a treadmill

b7 upright exercise bike

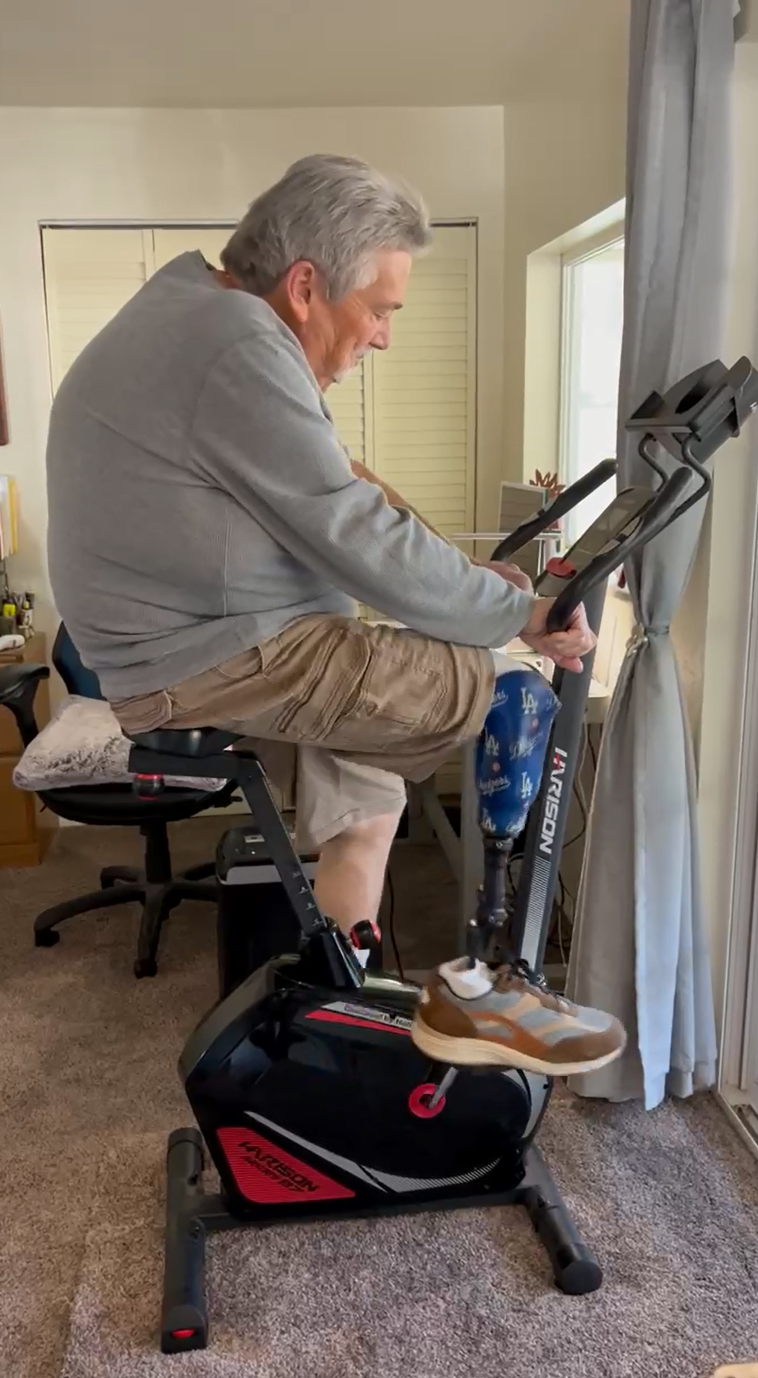
Best Exercise Bike for Amputee Rehabilitation: The Harison Bike

Best Exercise Bike for Amputee Rehabilitation: The Harison Bike

The Importance of Exercise for Amputees

Amputees often face unique challenges when staying active and maintaining their physical health. Exercise is essential for amputees, as it can help improve cardiovascular health, build strength and endurance, and boost overall well-being. However, finding the right equipment can be challenging. One option that many amputees turn to is an exercise bike. Based on customer feedback, this article will discuss the best amputee rehabilitation exercise bike.

The Importance of Exercise for Amputees

The Harison Stationary Upright Exercise Bike with Magnetic Resistance Series B7

According to customer feedback, the Harison Stationary Upright Exercise Bike with Magnetic Resistance Series B7 is an excellent option for amputee rehabilitation. One customer shared that their brother-in-law had used this bike for a year and a half to keep his cardiovascular system in shape. He uses the cycle five days a week for sessions ranging from an hour to an hour and a half.


Amputee Exercises

Benefits of the Harison Exercise Bike for Amputees

The Harison Stationary Upright Exercise Bike with Magnetic Resistance Series B7 is a high-quality exercise bike designed to meet the specific needs of amputees. The bike has various innovative features and specifications, making it an excellent choice for amputee rehabilitation. Here are some of the benefits:

  • Magnetic Resistance: The Harison Exercise Bike is equipped with magnetic resistance, providing a smooth and quiet ride. This feature is essential for amputees, who may have sensitive joints or experience discomfort during exercise. The magnetic resistance also allows for more precise control over the intensity of the workout.
  • Adjustable Seat and Handlebars: The exercise bike has an adjustable seat and handlebars, which can be customized to fit each user’s unique needs and preferences. This is particularly important for amputees, who may require a different position or angle to accommodate their prosthetic. The seat and handlebars can be easily adjusted using a quick-release knob, and the bike also has a built-in leveling system to ensure a stable ride.
  • Built-in Programs:This bike has 16 built-in programs that can be customized to meet individual needs. These programs can help amputees build endurance and strength at a comfortable pace without risking injury or discomfort. The built-in programs also allow amputees to track their progress and set goals for themselves.
  • LCD Display:The Harison Exercise Bike features an easy-to-read LCD that shows the user’s time, distance, speed, calories burned, and heart rate. This information can monitor progress and adjust the workout as needed.
  • High-Quality Construction: It is built to last, with a sturdy frame and high-quality components. The bike is designed to support users weighing up to 350 pounds, and the pedals are oversized for added stability and comfort. The bike is also easy to assemble, with clear instructions and all necessary tools included.
  • Ergonomic Design:The bike has an ergonomic design, which ensures a comfortable ride and reduces the risk of injury. The bike has a large padded seat and handlebars, providing added support and comfort during the workout. The bike also has adjustable foot straps, which can be used to secure the feet in place during exercise.

Benefits of the Harison Exercise Bike for Amputees

Final Word

The Harison Stationary Upright Exercise Bike with Magnetic Resistance Series B7 is an excellent option for amputee rehabilitation. It provides a smooth and quiet ride, has an adjustable seat and handlebars, built-in programs, and is easy to assemble and use. If you are an amputee looking for an exercise bike to help you stay active and maintain your physical health, the Harison Exercise Bike is worth considering.


HR-424 Push Up Board

How to Use the HARISON Push-Up Board | home gym HARISON

Maximizing Your Workout: How to Use the HARISON Push-Up Board HR-424

Maximizing Your Workout Push-Up Board HR-424


Push-up boards are a great tool to enhance your upper body workout routine and strengthen your chest, shoulders, triceps, and core muscles. The HARISON push-up board HR-424 is a beginner-friendly tool that helps users perform push-ups with proper form and stability, leading to better results and reducing the risk of injury. This article will discuss how to use the HARISON push-up board and its various features.


Getting Started With the HARISON Push-Up Board HR-424

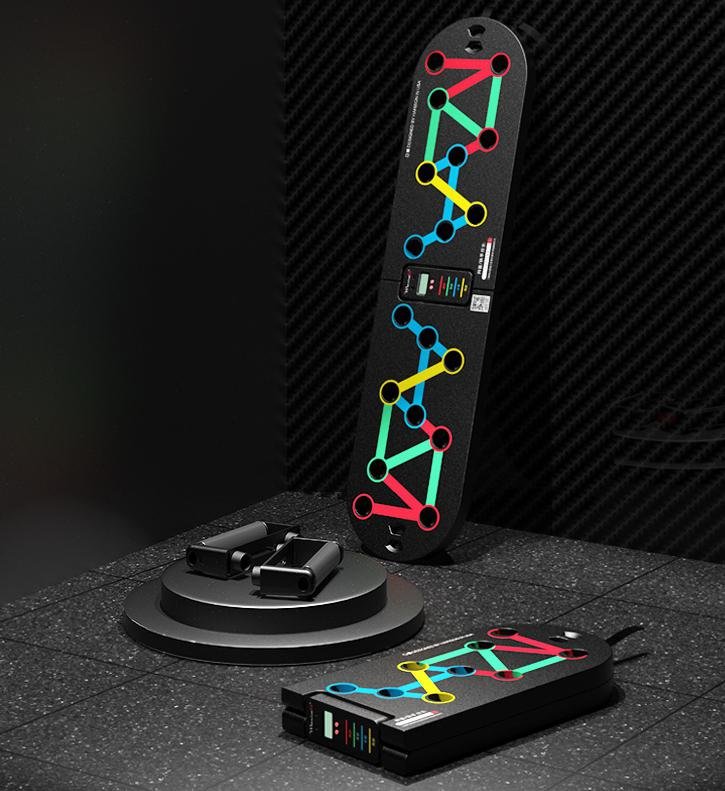
Before you start using the HARISON push-up board HR-424, it’s essential to set it up correctly. First, place the board on a flat surface and align the handles with the color-coded slots on the board. The color-coded system helps you target specific muscle groups, such as red for the shoulders, yellow for the back, and blue for the triceps. Once you have aligned the handles, press them firmly into the slots to ensure they’re secure.

Traditional Push-Ups


Using the HARISON Push-Up Board HR-424

In the following sections, we’ll take a closer look at how to use the HARISON Push-Up Board HR-424 to get the most out of your workouts and achieve your fitness goals.


Traditional Push-Ups

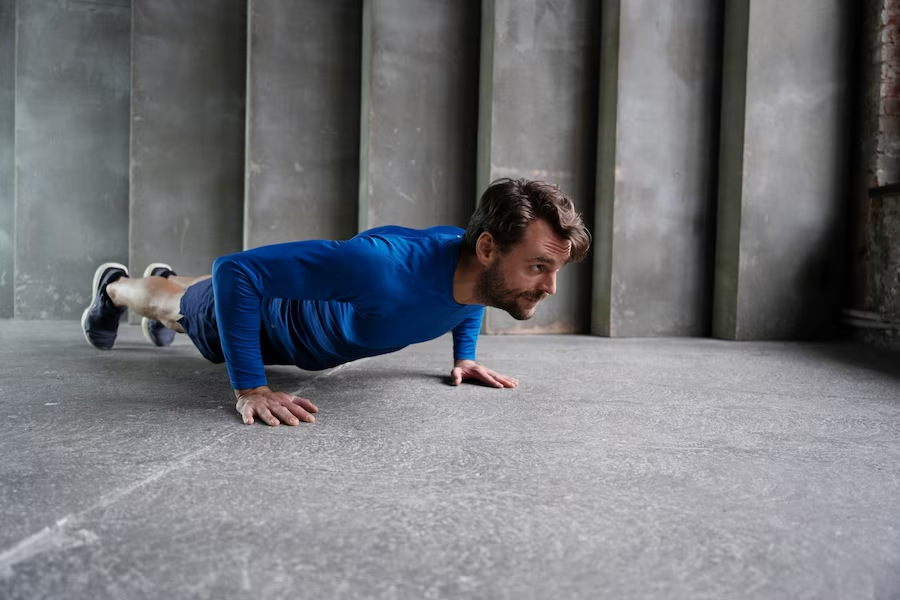
To perform traditional push-ups using the HARISON push-up board, place your hands on the handles in the position that targets the specific muscle group you want to work on. For example, if you work on your shoulders, place your hands on the red handles. Ensure your body is straight and your core muscles are engaged. Lower your body until your chest almost touches the board, then push yourself back to the starting position.


Incline Push-Ups

To perform incline push-ups:

  1. Place the board in an elevated position against a sturdy object such as a wall or bench.
  2. Place your hands on the handles, ensuring they align with the color-coded slots targeting your desired muscle group.
  3. Lean your body forward, keeping your core muscles engaged, and lower your body towards the board, then push yourself back up to the starting position.


Decline Push-Ups

To perform decline push-ups:

  1. Place the board in a lower position, with the color-coded slots facing away from you.
  2. Place your feet on the board and your hands on the handles.
  3. Lower your body towards the board, keeping your core muscles engaged, then push yourself back to the starting position.


The Features of HARISON

MonicaFit 424 Push-up Board

MonicaFit 424 Push-up Board

The HARISON Push-Up Board HR-424 is an innovative fitness tool designed to help users perform push-up exercises with precision and ease. Here’s a closer look at some of its unique features:

  • Color-coded handles for targeted muscle training: The HARISON Push Up Board HR-424 com
  • https://youtu.be/3kLAjy3tuwEes with color-coded handles that allow users to target specific muscle groups while performing push-ups. The red handles target the shoulders, the yellow handles target the back, the blue handles target the triceps, and the green handles target the chest. This feature ensures that users can train their muscles effectively and efficiently without wasting time on exercises that don’t work.
  • Foldable design for easy storage and transportation:The push-up board’s foldable design is another unique feature that sets it apart from other fitness equipment. It can be easily folded and stored in a closet or under a bed, making it ideal for those with limited space in their home gym. Additionally, it’s easy to transport, so users can take it with them when they travel or work out outside.
  • Non-slip base for stability and safety:The HARISON Push-Up Board HR-424 has a non-slip base that provides stability during exercise and prevents the board from slipping or sliding on the floor. This feature is essential for maintaining proper form and reducing the risk of injury. Users can confidently perform their exercises, knowing they are stable and secure.
  • 500lbs capacity for users of all sizes and fitness levels: It is designed to support up to 500lbs of weight, making it suitable for users of all sizes and fitness levels. Whether a beginner or an experienced athlete, this feature ensures you can use the board comfortably and safely without worrying about it collapsing or breaking under your weight.
  • Counter and resistance bands for added challenge and progress tracking: The board has a built-in counter that helps users keep track of their repetitions and progress. This feature allows users to set goals and monitor their progress over time, motivating them to push themselves harder and achieve better results. It also includes two resistance bands that can be used to add resistance to push-up exercises or other strength training exercises, providing users with an added challenge and variety to their workouts.
  • Beginner-friendly with instructional manual:The HARISON Push-Up Board HR-424 is designed to be beginner-friendly, with an instructional manual that guides how to use the board and perform different exercises correctly. This feature ensures that users can get the most out of their workouts, regardless of their fitness level or experience.

Final Thought

The HARISON push-up board HR-424 is an excellent tool for enhancing their upper body workout routine. Its color-coded system makes it easy to target specific muscle groups, while it’s non-slip base and beginner-friendly design ensure proper form and stability during exercises. Whether a beginner or an experienced athlete, the HARISON push-up board HR-424 is an excellent addition to your workout routine.


HARISON 424 push up board:https://www.harisonusa.com/product/monicafit-424-push-up-board/ 

HARISON Push Up Board

HARISON Push Up Board Review: Is It Worth the Investment?

HARISON Push Up Board Review: Is It Worth the Investment?

Although many people believe that the only way to build muscle is by lifting weights, there are other ways to achieve this. While this is true, there are different ways to gain strength. One of these methods is using a pushup board. Push up boards are often used as an alternative to traditional pushups because they allow you to do more repetitions without getting tired or straining your joints. If you are interested in performing pushups in a way that will strengthen muscles in your upper body, read this HARISON Push Up Board review.

1. What is a Push Up Board?

A pushup board is a device that allows you to do pushups without straining your wrists or shoulders. You can achieve it by providing an elevated surface for your hands.


Pushup boards are usually made of hard plastic and come in various styles and colors. There are also models made of foam or neoprene, but these tend to wear out more quickly than plastic models.


The most common type of pushup board is the balance type. This style has two handles where you place your hands and a center pivot point that allows you to do pushups while still keeping your hands elevated off the floor.


The other type is a wedge board with an angled surface for your hands.

Push Up Board Review

2. How to Use a Push Board?

Push up boards are easy to use. Place your hands on the handles, put your feet on the ground, and start doing pushups!


If you want to do more advanced movements, such as triangle pushups or clapping pushups, move your hands apart from each other on the handles.


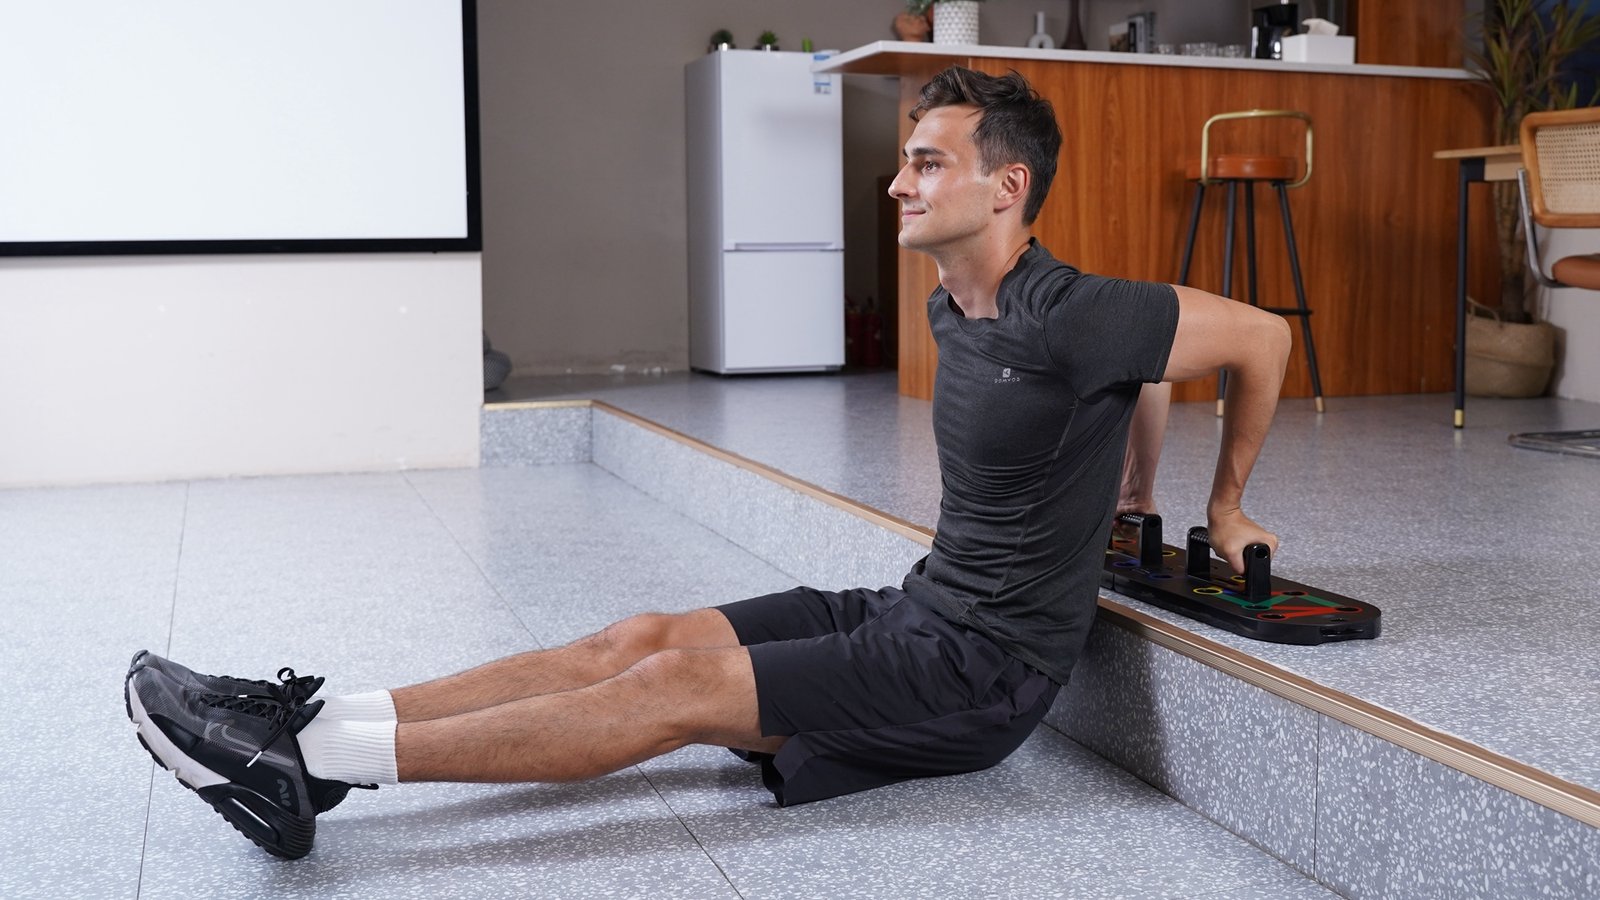
If you want to do a reverse pushup, move your hands toward each other on the handles. Pushup boards are also great for people who want to build muscle in their upper body and core!

Push Up Board Review

3. What Are Some Benefits of Using a Push Up Board?

Pushup boards offer several benefits. One of the best ones is that they allow you to get a full range of motion when performing pushups.


It means you can focus on your chest, shoulders, and triceps! Pushup boards are also great for people with wrist problems, as they put less stress on this area than traditional pushups.


These boards are also great for people who want to build core strength. It will help you stabilize your body by engaging your core muscles when you perform a pushup.

MonicaFit 424 Push-up Board

4. Features of the Harison Push Up Board

The Harison Push-Up Board has several features that make it one of the best pushup boards on the market. It is lightweight, so it’s easy to carry around when traveling.


HARISON Fitness manufactures this board with ABS Ductile Plastic designed to last for years!


It also has a non-slip surface, so you won’t slip off the board when performing your pushups. It makes it easier to perform more repetitions without worrying about losing your balance.


The HARISON pushup board comes with a digital timer, making it easier to keep track of the time while you exercise. The new counting mode is ideal for anyone who wants to get their workout done quickly and efficiently without worrying about counting reps.


You can adjust the device to fit your personal needs. You can change the resistance bands to get the proper resistance when doing pushups. It will help improve muscle strength in your chest, shoulders, and triceps without putting unnecessary stress on your wrists or back.


The Harison Push-Up Board comes to provide extra support when performing your push ups. It makes it easier for beginners to complete their first few repetitions without straining their back muscles or shoulders.

Pros and Cons of the Harison Push Up Board

5. Pros and Cons of the Harison Push Up Board

The Harison Push-Up Board is an excellent tool for building strength and muscle tone. However, as with any other product, it’s not without flaws.


Pros

-Provides extra support during pushups

-It’s easy to adjust resistance bands for different levels of strength

-Made from high-quality materials

-It’s compact and portable, making it easy to store in your home or gym bag

-It’s effective at building strength and muscle tone


Cons

-The resistance bands may become tangled if not stored properly

-The band that wraps around your back may be too tight or loose, depending on how you adjust it

6. HARISON Push Up Board Review: Conclusion

The HARISON Push-Up Board is worth considering if you’re looking for a product to help you build strength and muscle tone. It’s easy to use and can be adjusted easily depending on your fitness level.


The Harison pushup board is a great way to improve your pushups and build strength in your upper body without spending money on a gym membership. It’s easy to use, comfortable, and effective.


The resistance bands come with high-quality materials that won’t break or tear easily. Adapting may take some time, but the benefits will eventually become apparent.


You can buy the product by clicking this link.

Read more

HARISON WEIGHT BENCH 609

How to do leg extension workout at home? | Home Gym, HARISON

How to do leg extension workout at home?

Leg extension workout is a great way to strengthen the legs most effectively. However, many people struggle with this workout due to a lack of equipment or space for exercising at home. Fortunately, there are some ways of doing leg extension workout that are very simple and can be used by anyone in order to achieve the best results.

How to do leg extension workout at home:

  1. Find a comfortable chair, desk, or standing position. This can be adjusted based on the person’s height and ability.


  1. Sit up straight with your feet shoulder-width apart. If you are not relaxed, your body will want to compensate by leaning forward and rounding your back which is not the best way to perform this exercise correctly.


  1. Flex your elbows and pull your shoulders back as if you are trying to touch the ceiling with them.


  1. Inhale and at the same time, lift your legs straight up off of the floor to where your body forms a straight line again. Ideally, you should form a straight line from your feet all the way to the top of your head [but this is not always possible].


  1. After a slight pause, lower back down below parallel to the ground and repeat.


  1. Repeat this exercise as many times as you can without tiring out. If your knees start to feel sore, then it’s time to stop, otherwise keep going.

Top 5 leg extension workouts to try at home:


  1. Seated leg extension;

The leg extension machine is used by sitting in a chair and positioning your foot so that it is about 5-6.5 inches off the ground and roughly right where your toe meets the ball of your foot. To accomplish this, you want to put your knees together, bend at the waist, and lower your heels as close to the floor as possible while still keeping them together. This will support you while you perform the exercise.

  1. Standing leg extension;

This is an intermediate leg extension workout and it uses the same principles as the seated leg extension. However, instead of using a chair to lean against, you will be using a wall. This is done by placing your body perpendicular to the wall so that your back and head are supported by it while still keeping your heels on the ground.

  1. Bent knee leg extension;

This is a very effective leg extension workout that requires a chair or countertop for support. It is actually quite similar to the seated leg extension except that instead of sitting, you are bending your knees in order to lower yourself towards the ground. This increases the muscle tension in your legs and works them harder while also improving balance. The person performing this exercise can also intensify it by lifting their heels off of the ground as they concentrate on squeezing their glutes.

  1. Kettle bell leg extension;

This type of leg extension workout can be performed with a single kettle bell or a pair of them. It involves lifting the kettle bells straight up into the air towards the ceiling while standing on your tiptoes which will make it an intermediate to advanced leg extension workout depending on how many repetitions you do. It will also work your calves and glutes while also increasing your grip strength.

Conclusion:

This is a very effective way to strengthen your legs without any added equipment or space. It’s also a very simple form of leg extension workout that can be easily adapted to the specific needs of the person exercising.

They are simple exercises that do not require a lot of equipment and space can be done at home to strengthen the legs which is a great way to train for people who don’t want to spend a lot of time in the gym.

HARISON WEIGHT BENCH 609 (1)

Best 10 Tips for Doing Leg Extension Workout at Home

Tips for Doing Leg Extension Workout at Home

Do you want to feel your muscles working? Do you want to burn fat and build muscle? If you’re looking for a way to do this without joining a gym, then leg extension workout at home are the answer. You can do them anywhere – in your living room, on your back porch, or even in your bedroom. Leg extensions are incredibly effective for toning your thighs, glutes, hamstrings, and calves because they require strength and endurance. The key is to choose the right weight and perform the exercise properly – so that you can actually get a good workout. Here are tips on how to do leg extensions:

Use a Squat Rack

A squat rack is the best way to do leg extensions at home because it allows you to place your feet on the pins in a way that makes it easier to keep your back straight and your knees behind your toes. You can also use a leg extension machine with a barbell if you don’t have access to a squat rack, but make sure that your knees are directly below the barbell and that you don’t allow them to come above it during the exercise.

harison barbell rack squat stand

Warm Up Properly

Warm up properly with hamstring stretches before and after each set when doing leg extensions. This will help prevent injury, especially if you do them regularly over time. If you do them before, they help reduce soreness as well.

Don’t Bounce Out of Position

If you’re new to leg extensions, try not to bounce during the exercise – this will put undue strain on your lower back and could cause injury down the line if done repeatedly without proper warm-up first!

Use a Bench With Padding to Protect Your Joints

Leg extensions are a great exercise for the lower body, but they can cause problems if you do them incorrectly. Do them on a flat surface in front of a mirror to prevent strain on your spine and joints.

HARISON WEIGHT BENCH 609

Place Your Feet on the Floor or Use an Incline Bench

Leg extensions aim to extend the knee past 90 degrees, so it’s important to keep your feet flat on the floor or bench. The incline position provides extra resistance, which works for more muscle groups and stretches muscles differently than regular leg extensions.

Do Not Hyperextend Your Lower Back

When you do leg extensions, don’t hyperextend your lower back and arch your back too much because this puts unnecessary strain on the discs between vertebrae (the intervertebral discs), which may cause injury over time.

Do Them Daily

Leg extensions are an explosive exercise; you will want to do them daily to keep the gains coming. Generally, it would help if you did leg extensions twice a week on non-consecutive days. This will allow your muscles to recover in between workouts and give you the most benefit from each session.

Work up Your Sets and Reps

Start with just one set of 10-15 repetitions first, then increase the number of sets as necessary until you reach your goal of total repetitions. You should feel a burn in your quads after doing just one set of leg extensions, so you know this is working! Once you feel that initial burn, build up by adding another set or two each week until you reach the desired amount of work for that particular workout.

Make Sure Your Form Is Correct

The most important thing about doing leg extensions at home is ensuring that your form is correct! If this isn’t done correctly, then there’s no way that the exercises will be effective or beneficial for muscle growth! So make sure that everything from stance to positioning.

Wrapping Up

Leg Extensions are one of the most popular exercises for strengthening your lower body. They work your quadriceps, hamstrings, and glutes. If you want to get stronger and build up your lower body, you’ll want to work with Barbells. Since they’re the strongest barbells, they’ll allow you to lift more weight than dumbbells or kettlebells. The biggest problem when doing leg extensions at home is that they don’t use enough weight. This can lead to injury or burnout because they end up feeling like a failure after not being able to do as many sets or reps as they were planning on doing at first.

Are Leg Curl Extension Good for Football Players

Are Leg Curl Extension Good for Football Players


As a football player, you need to be strong in the lower body to improve your speed and power. This is why you should include this exercise in your training routine. The leg curl extension helps to generate power because it works all the muscles in the lower body.

Leg Curl Extension

It is also safer than other exercises because you can control the pressure on your muscles more precisely as well as developing stability and strength in your hamstrings, glutes and other muscles for American football. And if you want to know more about leg curl extension, then this article is what you’re looking for.


What are leg curl extensions?


Leg curls are an exercise that train muscles in the lower body. These muscles include the hamstrings, glutes and other muscles in the thighs and back of the legs. The hamstring muscles are especially important for American footballers because they help them move with speed and power.


This helps them to break tackles, jump high into the air when making a tackle or get to a loose ball quickly after it has been kicked. They are used to carry out a lot of running and sprinting, so they need to be strong.


Leg Curl ExtensionHow do leg curl extensions help American footballers?

Leg curls are an effective way of strengthening the muscles in your lower body, and this makes them very important for your American football training.

When your hamstrings, glutes and other lower-body muscles are well trained, the footballer develops more power and speed. This will improves their game in American football.


For American footballers, good hamstring strength is especially important because it helps with speed and running ability. If you want to run fast, you need to be strong in your hamstrings.

To run quickly, you need to improve your hamstring strength. This is especially true for wide receivers, running backs and safeties. Good hamstring strength helps your speed and running ability.


Footballers also need to jump high when participating in American football, so a stronger lower-body is important. When starting off with the leg curl exercise, you should use light weights.

This will help you get used to the movement pattern and practice your form while avoiding injury. As you become stronger, you can make the exercise harder by using heavier weights.


Leg Curl Extension

How to do the leg curl extensions exercise


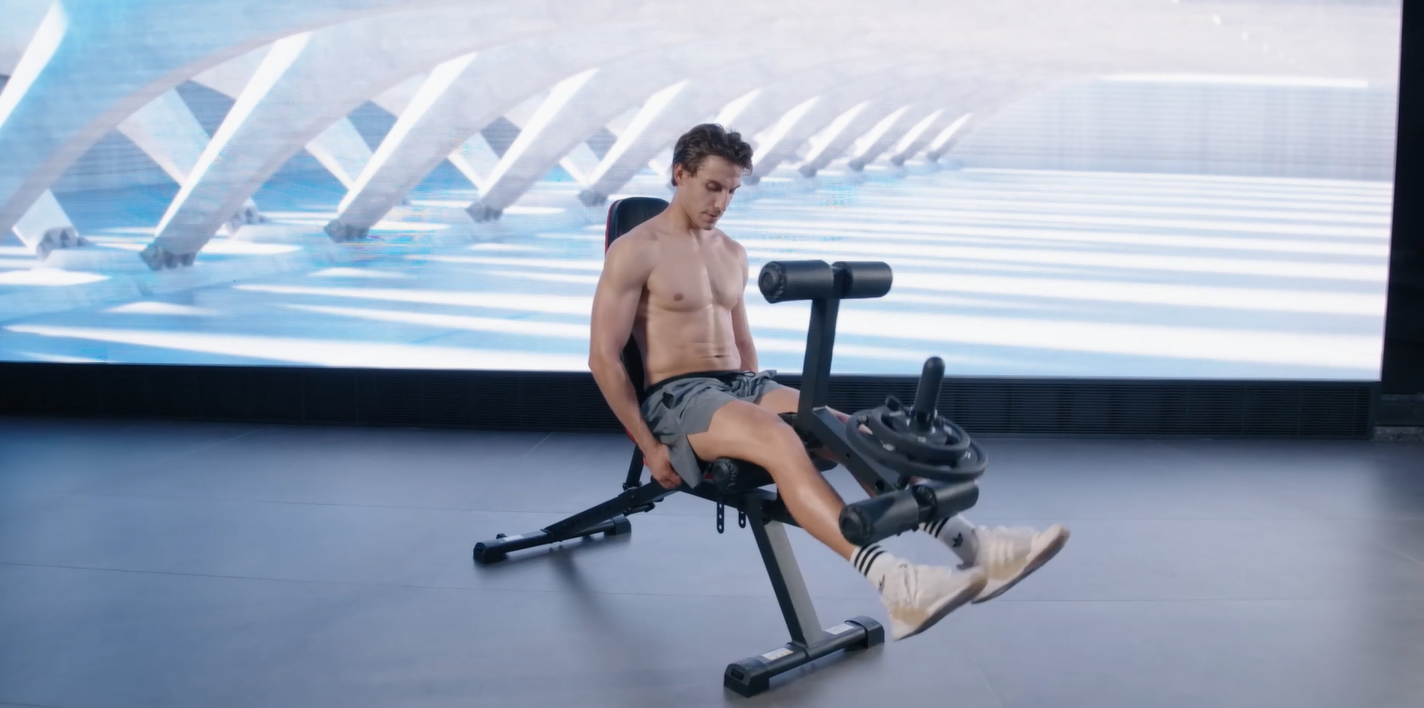
  1. Sit on a weight bench with your back straight and your legs lying fully on the roller pad, the roller pad should be a few inches from your calves.


  1. Slowly bend your knees, pushing your ankles as close to your backside as you can using your hamstrings to take weight off the plate. Hold this position briefly.


  1. Straighten both legs fully and return them to their original position. Repeat.

The number and weight of the weights you use will depend on your starting level in the exercise.


You can also perform this exercise while lying flat on the leg curl extension machine, using your hips and holding onto the support handles to remain in position.


To perform this exercise correctly, it is important that you do not lean forward as you bend and straighten your legs. In this position, the weight on your hamstrings takes all the strain and does not rest evenly throughout the movement. This can cause injuries or strain and damage to muscles if you abuse them too much or overdo them.


Leg Curl Extension

Conclusion:


Overall training is important to strengthen the muscles in your lower body, and this makes leg curls an effective way of improving your American football training. It will give you more power and speed to improve your game, so you can become a better footballer.

harison weight bench fitness bench 609 blog (3)

5 Best Leg Exercise at Home by Leg Machine

5 Best Leg Exercise at Home by Leg Machine

5 Best Leg Exercise at Home by Leg Machine

Going to the gym every day for a workout can be a challenge based on motivation, lifestyle, location, and time. It’s not for everyone. Some people prefer to work out at home, which saves money on gym memberships, childcare, and gas. It also saves time, with no commute, and prevents you from making some common excuses when you lack the motivation to get ready and go. The Harison leg extension machine can provide an excellent workout right from the comfort of your own home. Here are 5 excellent ways you can get a great lower body workout with leg machine without ever leaving the house.

1. 1 1/4 Leg Extensions by Leg Machine

Start in a seated position, with your back pressed firmly into the back pad. Place your legs under the leg pad, knees bent at a 90-degree angle, with the pad resting on top of your ankles. This is your starting position. Keep your torso as still as possible and your feet flexed or in a neutral position. Extend your knees and push the pad upward until your legs are straight. You should feel the tension in the top part of your legs (quadriceps). Return to the starting position, while keeping your feet in position, repeat the movement for a quarter of the original movement, meaning only to raise your legs about a quarter of the way. Return to the starting position. This will count as one rep. You can make this more difficult as you progress by holding the legs straight at the top of the movement for a 2-3 second pause.

2. Bodyweig Squats

Begin with your feet positioned slightly wider than your shoulders with the toes turned outward. Keeping your torso upright, with a proud chest, lower your body to just below 90 degrees, so that your hips are slightly below your knees. Push your feet into the ground to rise back up to the starting position and repeat for the desired number of repetitions.  When pushing your feet into the ground, it’s important to create a tripod base, meaning your big toe, small toe and heel should all push firmly into the ground when lowering your body and rising, never letting your heel come off the ground. You can practice this move with a stool or small chair if you’re just starting out. Start by lowering yourself onto the chair for a quick tap, then rising again. You can progress this by adding weight or by pausing for 2-3 seconds before rising up to the starting position.+

3. Lying Hamstring Curls by Leg Machine

5 Best Leg Exercise at Home by Leg Machine

Begin in a lying position with your chest pressed firmly into the pad and your hands gripping the sides of the pad. Place your legs under the leg pad, so that the pad is resting just above your heels. Keeping the glutes tight with feet in a flexed position, and your head looking down so that it is aligned with your spine, raise the pad so your heels travel upward towards your glutes. You should feel the tension in the back of your legs (hamstrings). Lower the pad and return to the starting position. Repeat for the desired number of repetitions. You can progress this by targeting your inner and outer hamstring fibers. Turn the feet inward to target the inner hamstrings, and turn the feet outward to target the outer hamstrings.

4. Reverse Lunges

Begin by standing with your feet hip-width apart. Bring your right leg back, driving your left knee forward to bend at a 90-degree angle, Your left foot should be pushed into the ground creating a tripod effect as we discussed earlier. Your right foot should be bent so that only your toes are pushing into the ground and your right knee is hovering just above the ground or a slight tap on a padded surface. Pushing your weight onto your front foot return to the starting position. You can either repeat this move on the same side or alternate with the other foot. You can practice this by staying in the lunge position and pulsing (static lunge) or progress this by adding weight. You should feel the tension in your quadriceps, hamstrings, and glutes.

5. Step-Ups

Step-ups are a great way to target the gluteus maximus. Begin by finding a secured stool, chair, or outdoor ledge that is a few inches off the floor. This should be a height that you can safely step up onto with one foot without falling. Feel free to use something to hold onto if you are a beginner. Stand directly in front of the chair, and place your right foot onto it, lift yourself up by placing your weight only on the right foot using a tripod base. Your left foot should rise off the ground and hang just over the chair. Slowly lower yourself back down to the starting position. You can either repeat on one side or alternate each rep. Progress this by holding a dumbbell or weight plate. You can also progress this by increasing the height of the surface you are stepping onto.

Sample Workout:

Superset: 3 Rounds

1 1/4 Leg Extension 12 reps

Lying Hamstring Curls 12 reps

Triset: 3 Rounds

Bodyweight Squats 12 reps

Reverse Lunges 24 reps (12 each side)

Step-Ups 24 reps (12 each side)

Take a 30-second rest after each round and a 1-minute rest between the superset and triset.


  • A superset is two exercises performed back to back with no rest.
  • A triset is three exercises performed back to back with

MORE HOME GYM EQUIPMENT:

harison weight bench fitness bench 609 blog (7)

Top 5 Exercises by Leg Extension Machine to Tone Your Legs

Leg extension machines are used by Fitness centers and gym owners use leg extension machines to give the user a challenging leg workout that builds muscle strength and definition. With heavy-duty construction, the leg extension machine can be relied on to help you get a more difficult workout while still maintaining proper form. For those looking to tone their legs, this exercise will help them reach their goals. Below are some exercises you can do with a leg extension machine at home.

Leg Extension

If you want toned legs and don’t have a gym membership, you can do several exercises at home with a leg extension machine to get the job done. Leg extensions are the perfect addition to your workout routine if you’re looking for stronger, more toned legs.

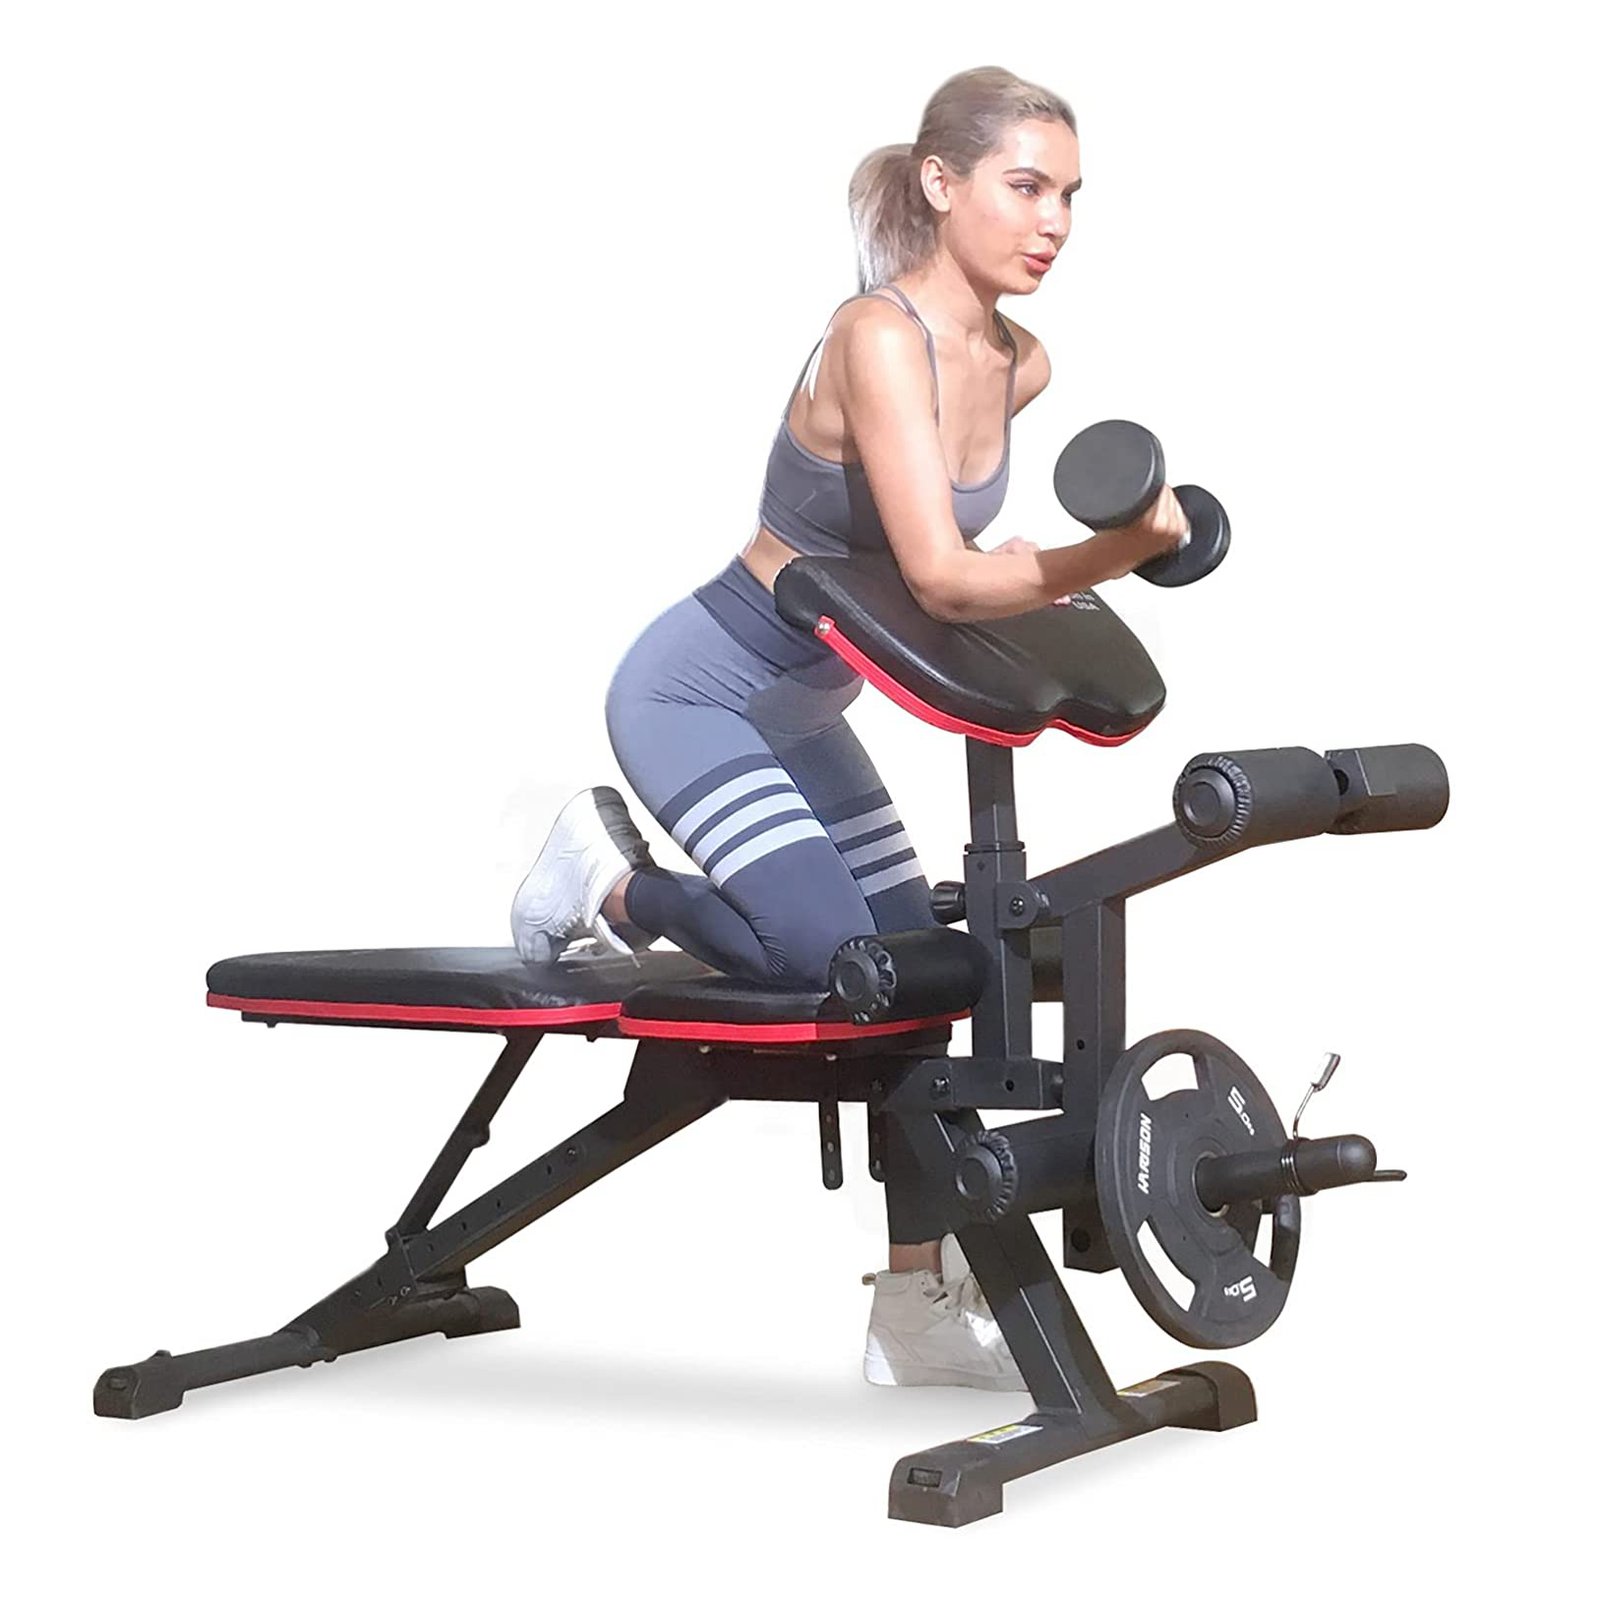
Leg extensions are an isolation exercise that targets the quadriceps. They require you to sit down on the leg extension machine, equipped with a pad that rests on your lower thighs. You then lift the padded lever by extending your legs until they are straight out before you, and then slowly return to the starting position.

It’s important to remember that you should use proper form when performing this exercise. Start by sitting on the leg extension machine, placing your legs under the pad, and grabbing onto the side handles. Your knees should be bent at a 90-degree angle. This is your starting position.

Slowly extend your legs to straight until you feel a slight stretch in your lower abs, hold for 1 second and then come back down to the starting position. Ensure to inhale as you perform this portion of the movement and exhale as you return to the starting position.

Single-Leg Curls

Try the single-leg curl if you’re looking for a more challenging leg exercise! This move is a bit trickier to perform, but you’ll be able to get the hang of it with practice.

Position yourself on the machine with one leg resting on the pad. Lean forward so that your upper body is about 45 degrees from horizontal. Grasp the handles firmly and slowly bring your heel towards your butt. Hold for a moment and then return to starting position.

Repeat this motion ten times on each leg and then switch legs. You should feel a burn in your hamstring muscles as the machine lifts your body weight against gravity. If you don’t feel anything or if it’s too easy, try increasing the weight on the machine by adjusting the pin that holds up all of those weights (also known as “plates”).

Calf Raises

If you have a leg extension machine at home, you can use it to tone your legs. One of the best exercises you can do with a leg extension machine to tone your legs is calf raises. To perform calf raises, stand upright facing a leg extension machine. Please pick up the barbell with both hands and place it on your shoulders. Hold the barbell with both hands as you stand tall and straighten your spine. Next, bend one knee and bring your torso down until it is almost parallel with the ground. Pause for three seconds, and then bring yourself back to the standing position. Alternate between legs for three sets of ten repetitions each.

Leg Curls

Leg curls are a great way to get toned, shapely legs without feeling like you’re doing too much work. By using a leg extension machine, you can work out your calves and thighs simultaneously by pulling your legs back behind you. This will help to tighten up and strengthen your muscles and build muscle mass.

Dumbbell Lunges

A leg extension machine is a great option for working out your legs at home because it doesn’t need much space, and it’s easy to store. One of the best ways to tone your legs with this equipment is by doing dumbbell lunges.

First, stand with your feet shoulder-width apart, holding dumbbells in each hand. Step forward one foot and lower your body until both knees are bent at roughly 90-degree angles. Do ten reps for each leg before moving on to another exercise.

Wrapping Up

Using a leg extension machine, performing effective leg exercises to tone your legs is best done. One of the best leg machines to tone your legs and glutes is a capable leg extension machine at home. While this exercise works your quadriceps muscles, a good machine will work your hamstrings more.

Did you have a leg extension machine for your home gym? Please feel free to leave comments below on what is your leg day routine!